Sending
- Methods of Sending (Browser, Cron, Command-line)
- Setting up your Cron
- Scheduling
- Sending a web-page
- Sending plain text
- Bounce Management
Methods of Sending (Browser, Cron, Command-line)
This page concerns phpList self-hosted users only. If you have a registered account at the phpList Hosted service, please contact hosted@phpList.com.
Setting up phpList for sending is a complex topic, there are many (many) variables, most of which which are out of the control of phpList developers, such as your hosting provider and server configuration.
In our early chapters, we have assumed that you are sending from the browser, to a small list, and that your phpList has been configured already.
How sending works
Once your campaign is ready, you need to tell phpList to send the campaign. There are two steps to this:
1. Submit the message to the queue.
When creating the campaign, the last tab of the workflow is the 'SEND' tab. Pressing the 'start campaign' button submits the campaign to the sending queue.
2. Process the queue, either manually via the browser or command line, or automatically via a cron job or remote queue processing system.
Manual sending using the browser
This is the simplest way to send. You must:
- Leave the browser open while your process the queue
- Leave your computer active (not asleep) while you process the queue
- Be aware that your hosting provider may not allow emails to be sent this way by default, or may suspend your account if you send volumes which breach their terms and conditions.
This method of sending works essentially as described in the chapter on Sending your first campaign. Using the default configuration file settings, either click the Process Queue button which is presented as the final step of the campaign workflow, or use the System > Process queue option from the main menu.
Once you begin sending you must leave the browser open: if the browser is closed while the message is sending, the queue processing will stop. To continue sending where you dropped off, you will need to open the browser, log into phpList, and "System"/"Process queue" again, leaving the browser open.
The system will send the queue using the settings in your config file (config.php), which controls the send rate, the envelope header, and so forth. You should talk to your hosting provider about these settings, they may want you to send in small batches or have a cap on the number of mails you can send each hour.
phpList.com remote queue processing
A wide explanation of how the phpList remote queue processing works is on the Resources page. Additionally, here you can can find some of the most frequently asked questions.
One way to bypass the issue of leaving your browser open without creating a cron job is to use the phpList.com remote queue processing system.
This means that once you click to process the queue, phpList.com will keep your system sending after you close your browser: you are still sending from your server, and according to the settings in config.php - phplist.com just keeps your system "awake" for you.
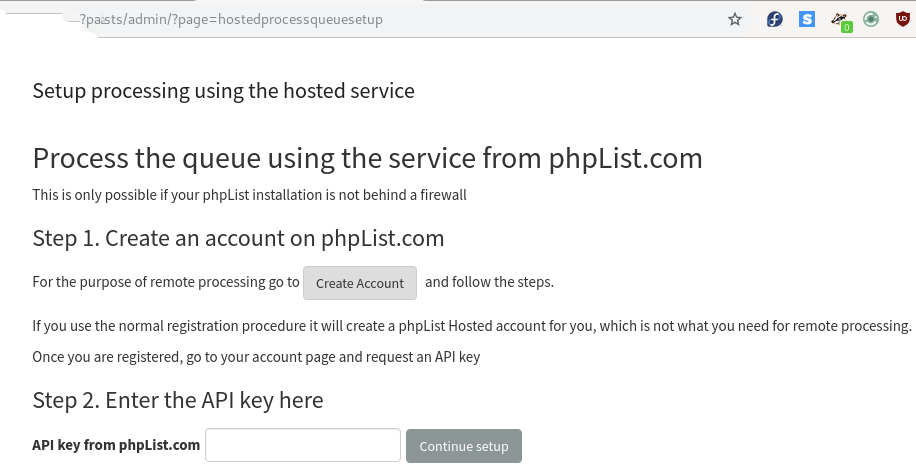
You will be prompted to consider this process the first time you send. If you have previously sent messages then visit http://yourdomain/lists/admin/?page=hostedprocessqueuesetup to get started.
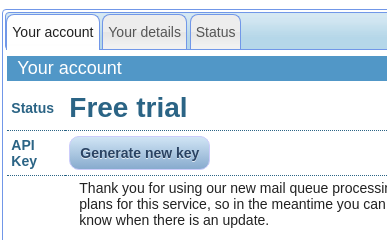
You should see the following page.
Click Create Account.
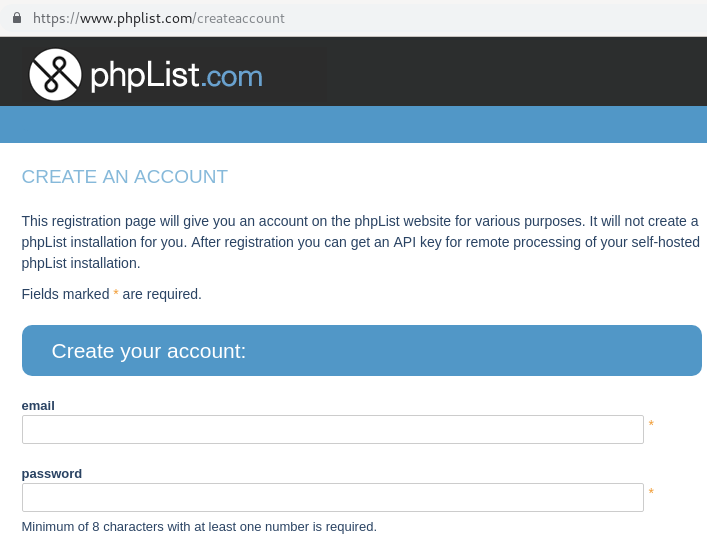
This opens a window with a phpList.com page enabling you to create a special phpList.com account. Fill out your details and click Create account.
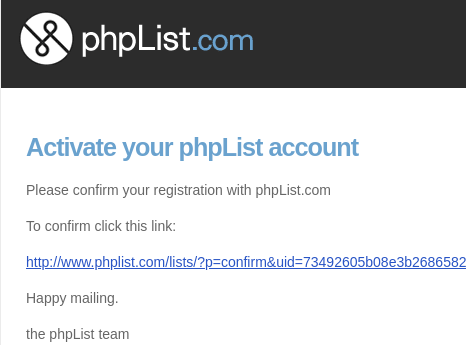
You then need to go to your email account and click the link in the confirmation email.
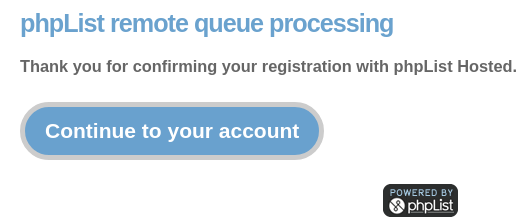
Click Continue to your account to go to your new account.
Click Generate new key to get your API key.
Copy the API key.
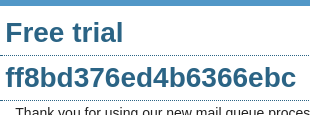
And paste it into your phpList installation, into the Enter the API key here box on http://yourdomain/lists/admin/?page=hostedprocessqueuesetup

Click Continue setup.
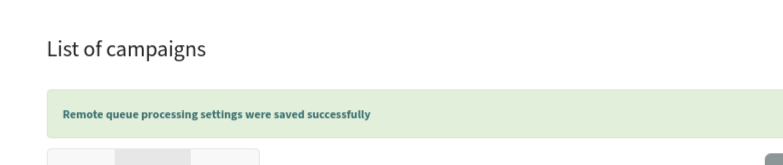
The process is now complete. When you add a message to the queue, it will be processed according to your settings.
Queue processing from a remote computer using a secret (Config > Settings > Secret for remote processing)
This is essentially the same system as above, but you don't use the phplist.com service, you use another server of your choosing. Documentation for this is here.
Automatic queue processing using the command line and Cron jobs
Background
A more advanced phpList configuration is to configure automatic queue processing from the command line of the computer (shell terminal). These are the most powerful ways of sending and they have many advantages. However, setting them up can be complicated for a variety of reasons including:
- Restrictions of hosting companies, such as GoDaddy, Hostgator and others
- Features of your virtual machine (VM) hosting account
- (In)Ability to ssh into the server to test commands
- PHP settings configured by your hosting company
- Working through a web based interface such as cpanel, or plesk to test and setup the required exact commands needed
- Limited access and permissions due to account type and user limitations
- Every hosting company sets this up a little differently, so require a setup specific to your exact situation.
If you don't understand, or give up trying to understand all these details, look for qualified third party support to configure this and/or offer hosted solutions that include automatic queue processing.
The Command line
The core of setting up the automatic processing is the command line that will 'do the deed'.
For queue processing, the general format is:
/usr/bin/php /home/mydomain/lists/admin/index.php -pprocessqueue -c/home/mydomain/lists/config/config.php
Breaking this down:
/usr/bin/php This is the command that invokes php. Your path may vary, as well as the exact php command ( php-cli or php-cgi). The exact path to the php command will need to be changed to match your system.
/home/mydomain/lists/admin/index.php This is the fully qualified path to the index.php file in the /lists/admin directory of your phpList installation, as seen by the php command (above). Getting this right usually requires some experimenting, and/or asking your hosting provider. The '/home/mydomain' part will need to be changed to match the layout of your system.
-pprocessqueue This specifies the action that you want to perform (processqueue)
-c/home/mydomain/lists/config/config.php This is the fully qualified path to the config file with your settings. The '/home/mydomain' part will need to be changed to match the layout of your system.
Once you determine the exact command line that will process the queue on your machine, then you need to run that command periodically via a cron job (also called a 'scheduled task' in the cpanel interface).
Setting up a cron job to periodically run the Command Line
See the chapter "Setting up your Cron".
Feedback
Discuss this chapter here.
Setting up your Cron
This page concerns phpList self-hosted users only. If you have a registered account at the phpList Hosted service, please contact hosted@phpList.com.
What is cron
Cron is a time based task scheduler on Unix-like operating systems. For more information check the Wikipedia page. This chapter will describe how to set this up on Linux. On other Unix systems the set up will be similar.
Why set up cron
When you set up the cron, two of the most time consuming parts of phpList will become automated. These are processing the queue and processing the bounces. Once you set up the cron, you will not have to do these in your browser, but they will happen automatically. Sending a campaign will become as easy as sending a normal email from your desktop.
Caveats
The method described in this chapter requires the CLI version of PHP. This may not be available on all systems. There are some "hacks" to make it work with other versions of PHP, but this is non-intentional functionality and therefore not described here.
Step 1: set up commandline
The easiest way to set up the cron is to set up a commandline script that will handle all phpList commands. There is an example in the "bin" directory in the phpList archive file.
Let's call the commandline script "phplist" and edit it with your favourite text editor:
$ nano phplist
and type (or copy-paste) the content (note the line breaks; the following command should be pasted literally as two lines):
#!/bin/bash
/usr/bin/php /home/website/public_html/lists/admin/index.php -c /home/website/public_html/lists/config/config.php $*
You will need to change the above content to fit your system:
#!/bin/bash -> the shell that you want to use
/usr/bin/php -> the path to the PHP-cli commandline interpreter, this can vary per system. Debian based systems (including Ubuntu) should install the "php-cli" package.
/home/website/public_html/lists/admin/index.php -> the path to your phpList installation, pointing to the index.php file in the admin directory of phpList
/home/website/public_html/lists/config/config.php -> the path to your config file
Once you have constructed your commandline file, place it somewhere in your path, e.g. in /usr/local/bin and make it executable.
chmod 755 /usr/local/bin/phplistFrom then on, you can process phpList on commandline, for example with
phplist -pprocessqueueStep 2: set up the crons
Once you have the commandline script, you can set up the crons with your favourite cron editor. On Linux, you type "crontab -e" in order to edit your cron entries.
0-59/5 * * * * phplist -pprocessqueue > /dev/null 2>&1
0 3 * * * phplist -pprocessbounces > /dev/null 2>&1
The above example will process the queue once every 5 minutes and process the bounces once a day. That will be sufficient for most systems.
The example also discards any output, which you will want to do. You can always check the output by running the above commands manually from the shell-prompt without
> /dev/null 2>&1On CentOS 7 you need to specify the full path to the bash script. Your cron entries should look like this:
0-59/5 * * * * /usr/local/bin/phplist -pprocessqueue > /dev/null 2>&1
0 3 * * * /usr/local/bin/phplist -pprocessbounces > /dev/null 2>&1
Step 3: tell phpList
Once you've set up the cron and it is working, you can tell phpList and some links will disappear. Put the following two lines in your config file:
define ("MANUALLY_PROCESS_BOUNCES",0);
define ("MANUALLY_PROCESS_QUEUE",0);
This will hide the links to process the queue and bounces from the phpList interface.
Remote queue processing
The remote queue processing is often called “phpList cron job” due to its similarity of other automatic cron jobs. Before version 3.1 there was not a standard option to process the queue from a different location than the same server your phpList instance is installed. From version 3.1.1 onwards there is an option to remotely process the queue. It is always highly recommended to use the latest phpList version for security updates and for your own convenience as latest versions offer more functionalities.
In Config -> Settings under the Security section, there will be an option called "Secret for remote processing". The first time, it will generate a random code, which you can use, or you can set your own. To run the queue remotely, all you need to do is load the following page:
http(s)://yoursite.com/lists/admin/?page=processqueue&secret=XXXX
Where the XXXX is the value that is set for the "Secret for remote processing"
Use the Hosted Service
phpList.com now has a “secret” way to get our servers to process your queue for you. There are no payment plans and if you use this, you will help us to tweak the way it works, and in return we will process your queues without charge.
We offer this, because the last thing we'd want is that the queue processing is an obstacle for using phpList. From any point of view, but mostly performance, we advise the use of commandline processing because that is the most powerful way of sending. phpList Hosted is using commandline for everything. But in some cases this may not be an option. This is where our service hopefully fulfills a need.
To use the phpList.com queue processing service sign up at https://www.phplist.com/.
Once you signed up, get your API key.
The first time you try to manually process your queue, you will get the option to set up processing with phpList.com. You can use that to set up the API key.
Alternatively go to:
http://www.yoursite.com/lists/admin/?page=hostedprocessqueuesetupFrom then on, when you place a campaign in the queue, or requeue an existing one, it will activate the processing from our servers. We will run the queue very often and make sure your campaigns are sent.
If you place an embargo on a campaign, the hosted queue processing service will detect this and wait until your embargo has passed to send your campaigns.
We do keep track of the statistics, and we will give you a summary in your account pages. The phpList.com service uses the exact same system as the normal remote processing outlined above and we have no other access to your system.
Notes
There's no danger in overloading your server. When a second queue processing command is activated when the previous one is still active, phpList will detect this and bail out. Therefore there will always be one active queue sending process at any time. This is also important to ensure that the sending limits, set with Batch processing, will be honoured.
Appendix
How safe is this?
Is it not easy for someone to steal my secret? Particularly when you call the parameter “secret”.
It is quite safe, but you need to determine this for yourself. The output of the page when using the remote secret is minimised to only the statistics. If an “attacker” gets hold of your secret, all they would do is help you process your queue. In fact, if you run the queue this way yourself, you will be logged out from phpList. The access with the secret is restricted to processing the queue and nothing else. We will later on extend this to processing bounces as well. In comparison, using a “username=X&password=Y” processing URL would allow anyone snooping that data to have access to your entire phpList system.Also, if you use HTTPS, chances of someone stealing your secret are way lower.
What about timeouts, how long will the request last?
When run from a webpage, phpList, by default, will only run the queue processing for one minute. It will try to send as many mails as possible in that time. Then you will need to run it again.
Feedback
Discuss this chapter here.
Scheduling
In the campaign workflow you will find the scheduling tab.
If you want to send a campaign straight away, and there is no need to stop sending before a specific time, then you can leave these details unchanged and your campaign will simply send.
If your needs are more complex, read on.
Important information
Scheduling settings interact with your sending method. If you are only able to process your queue from within the browser because you have no cron or command-line access, then the embargo time feature will not work for you. To send a campaign from the browser you must always open your browser to process the queue and keep it open until you have finished, even if you have used an embargo time.
Scheduling tab
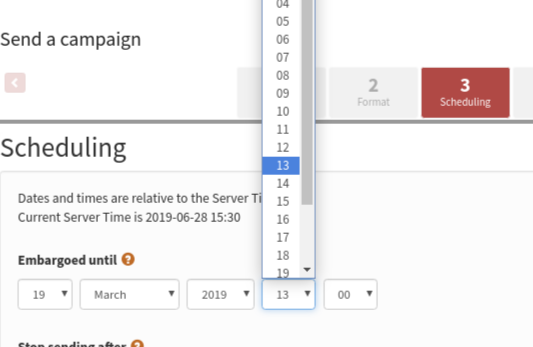
Below is an image of the scheduling tab. We we will work though it from top to bottom:
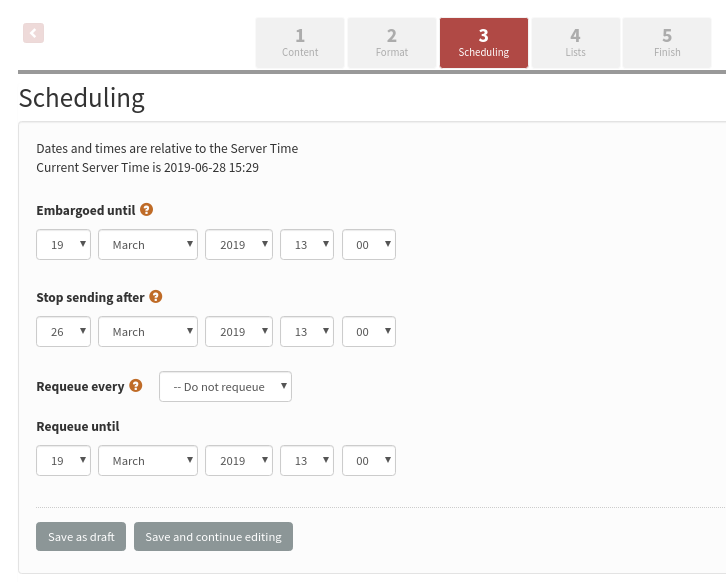
Server time
The server time may not be the same as your local time. All of the times in the scheduling page are relative to server time. Changing this time is an advanced feature.
Embargoed until
The campaign will not be sent until this time has passed. If you have a campaign which you wish to send at a later date, perhaps when you out of the office or away from your desk, then this is the feature you should use.
Embargo time is initially set to the nearest hour before you started your new campaign: this effectively switches off the embargo feature by default. To use the feature you must set the time in the future. Simply set the date and time to the time you want to send, relative to your server time which is stated above. Then place the campaign in the queue as normal. If you are using a cron job then the campaign will automatically start sending at the desired time.
Stop Sending After
This feature is used when the topic of a campaign is time sensitive, for example, a special offer with an expiration date or an event with a specific time. If the campaign would become irrelevant to anyone who received it after a particular time, then this is the feature you should use.
The primary use of this feature is when your list size exceeds your sending capacity within the timeframe you need to send your campaign in. For example, if you have a list of 10,000 subscribers and can send 1000 emails in an hour but the campaign becomes irrelevant in 8 hours time, you need to stop sending before everyone on your list has received a copy of the mail.
Re-Queue
The re-queue setting is used to send a campaign to subscribers who join a list after the campaign is sent. Remember, a campaign will never be sent to the same subscriber twice.
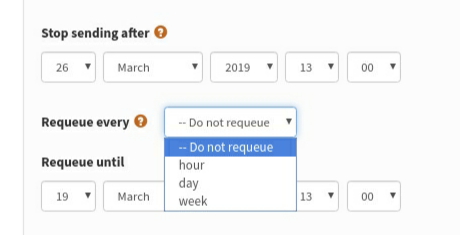
As an example, you create a monthly newsletter on the first of January, and send it to a list. Over the month you expect another 50 people to sign up, or be added to your list manually, and you would also like them to automatically receive a copy of the campaign. You would set up your campaign to re-queue every day and to re-queue until 31st of January.
Feedback
Discuss this chapter here.
Sending a web-page
To send a web page rather than a message to your subscribers, log in to your phpList admin pages, then choose to Send a Campaign Admin>Campaigns>Send a Campaign
From this page, click on Send a New Campaign (or edit an existing Campaign). In this example, I'll use Send a New Campaign.

This results in:

Choose Send a Webpage rather than Compose message and you should see this:
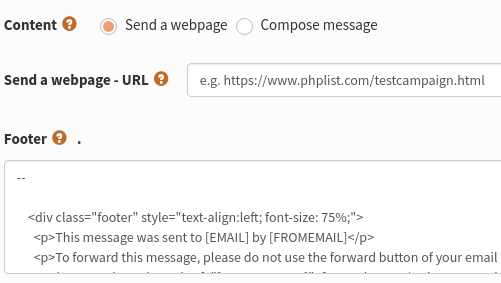
In the send a web page - URL box, enter the path of the webpage you wish to send. Click outside the box and the URL is validated.
If you get this message, then check and double check that the page you have entered actually exists. The URL does look correct, but the page does not in fact exist.

Once the page to be sent has been validated, simply select the template for your message (optional), the list to which you wish to send to (required), check that the embargo time is correct and send the campaign out.
Display Issues
Be aware that most email readers, especially those web-based ones (Hotmail/Outlook, Gmail etc) will not show images by default, it will be up to your subscribers to decide if they wish to receive images in emails by (usually) clicking on a link in the email reader. Don't assume that your images will automatically appear, so make sure your webpage includes ALT Text for each image in your page when designed.
Feedback
Discuss this chapter here.
Sending plain text
phpList always generates a plain text version of your campaign, which is then included in the html campaigns as a matter of course. This is part of the normal working of email functionality. phpList also gives you two additional features:
- Your subscribers can choose to receive plain text emails only
- You can edit the plain text version to improve it.
You can see the plain text version embedded in the source of your email by clicking View Source in your email client (exact instructions vary wildly)
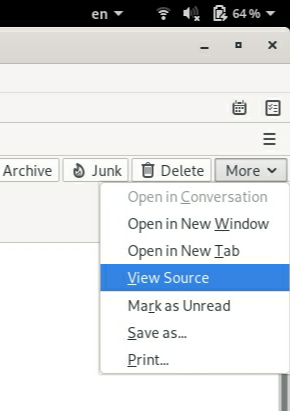
As you can see there is a plain text version in and amongst the html and other code.

Why edit the plain text version?
The automatically generated plain text version may not be very attractive. It is good practice to provide a quality plain text version because it:
- displays better in some email software
- makes your emails more accessible for people with visual impairments.
To assess the state of your default plain text version, you can click to view your emails only in plain text. In a desktop email client this is usually View > Message Body As > Plain text.
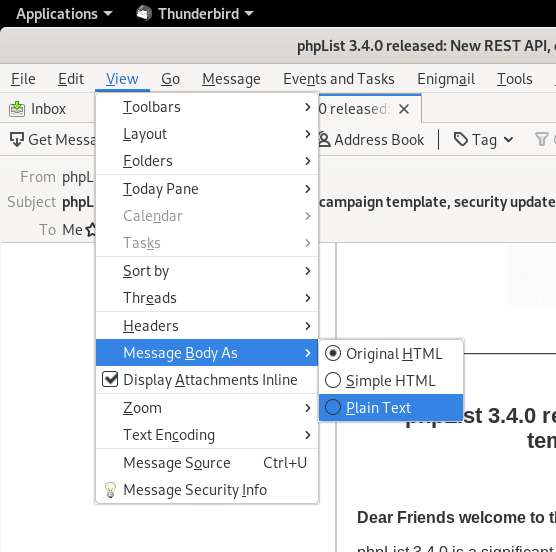
You can then see your email as it would be displayed to someone who is only able to receive plain text messages.

To improve this email and send a version formatted especially for these subscribers only takes a few extra moments and, as you can see, provides a much better quality of message.
Enabling plain text editing
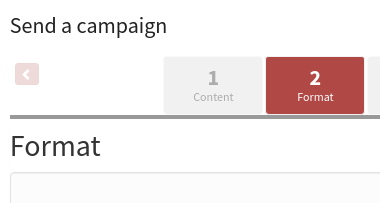
Some installations do not show the Text tab, which is used to manually configure your text-only email content. If your tabs look like this, you'll need to change the configuration:
To activate the Text tab in your installation, add the following lines to your config.php file:
# Manual text part, will give you an input box for the text version of the message
# instead of trying to create it by parsing the HTML version into plain text
define('USE_MANUAL_TEXT_PART',1);
An extra tab will now display in your campaign workflow.


Create your plain text version
Once you've created your HTML version in the Content tab (tab 1) click the Next button.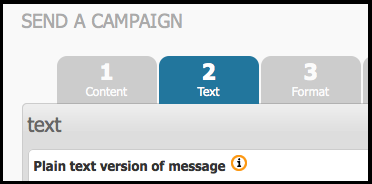
You should now be in the second tab, Text.
You can manually compose the plain text version, or you can generate it automatically by using the generate from HTML button. Some special characters in your html email may cause this automatic generation to fail. You can paste your text into this tab if you need to.
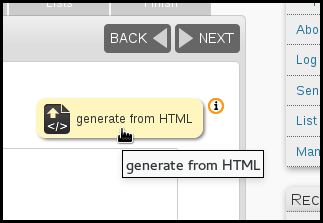
The empty Plain text version of message box will now contain a text only version of your html message.
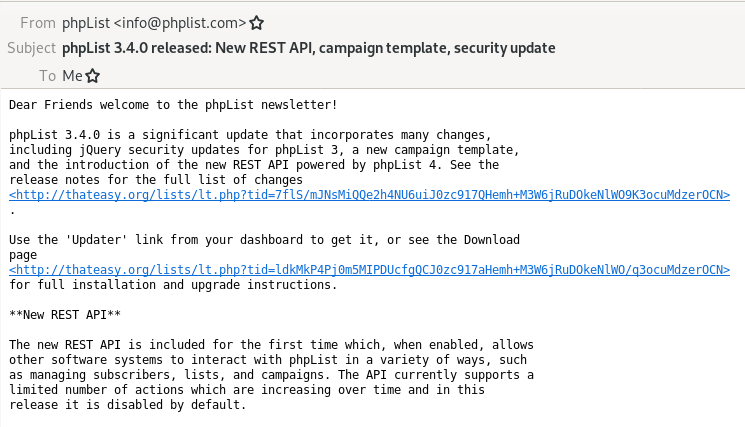
The content should be the same as the html version. However images in the html version will automatically be removed and replaced by text descriptions and URLs are replaced by links. You can edit the message further if required, to make it as attractive and legible as possible.
Once you are happy with your plain text version, click Save and continue editing button, at the bottom of the text editing box, and carry on with testing and sending your campaign.

When you send tests, you will receive two emails, one text and one html.
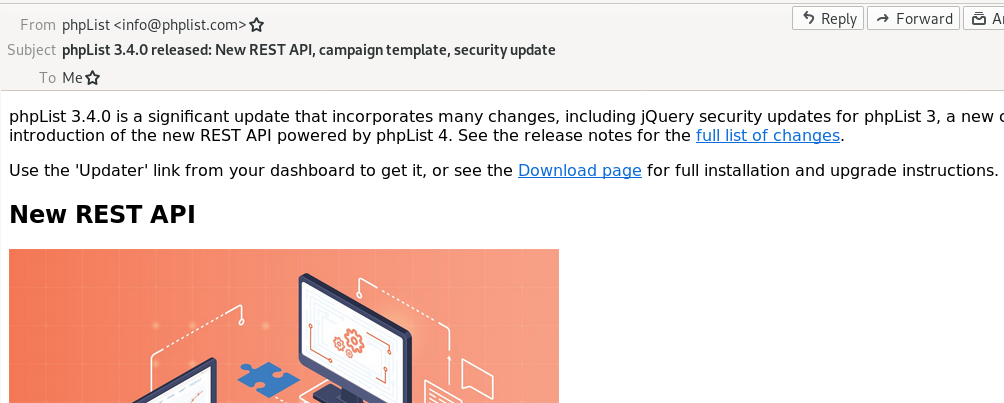
The HTML version:
The Plain text version
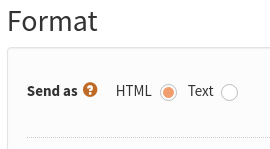
Format tab: ONLY send plain text?
On the format tab there is a radio button for sending in either HTML or Text. Typically you will want to select the "HTML" radio button, which sends a version of the message that each subscriber specified when they joined your list.
However, if you want to send the text version of the message, select the "Text" radio button. This will override the user preferences, and send all subscribers the text version of the email.
Feedback
Discuss this chapter here.
Bounce Management
Introduction to bounce management
Whenever an email is sent via the internet, regardless of the email software used, the email is transmitted by an MTA (Mail Transport Agent). In most cases the MTA is the internet provider’s SMTP mail server, sending to the MTA of the email’s recipient, through intermediary MTAs.
If the email cannot be delivered to its recipient, the last MTA that tried to transmit the email generates an error email, called a bounce message, which is sent back to the sender’s email.
Usually, this bounce message contains a specific error code that explains why your email could not be delivered to its recipient.
phpList implements bounce management which handles these bounce messages, and provides automatic actions depending on the error code, like removing an incorrect email address.
Setting up basic bounce management
Basic bounce management counts bounces and unconfirms a user after a given number of consecutive bounces.
Setting your bounce address
In order to use bounce management, you need to provide an email address where the bounce messages are sent to (e.g.: bounce@example.com). This email address is usually called the Return Path. Note that this email address will only be added to the email headers, and will not be shown to your users.
$message_envelope = 'bounce@example.com;
By default this setting is commented out (it has a # in front so will not be actioned).
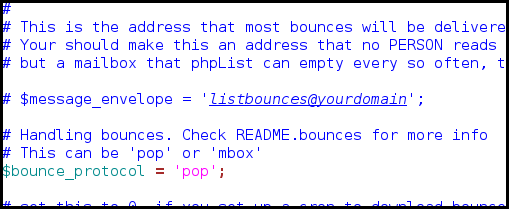
You will need to uncomment it (remove the hash) and change the email to reflect your new bounce email.
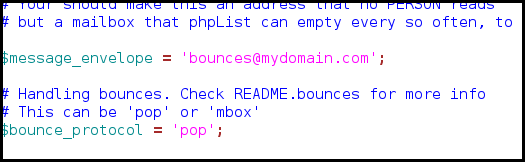
pop or mbox
phpList can fetch emails from the bounce mailbox via two protocols, mbox protocol where mails are accessed directly within a folder on the server, and pop3 protocol where mails are downloaded just like a mail client program would do it. The latter one is usually the simplest option, especially if you don’t host your phpList setup yourself.
You can specify which procotol to use in config.php with the following:
# This can be 'pop' or 'mbox'
$bounce_protocol = 'pop';
When accessing the bounce mailbox via mbox protocol, we need to tell phpList where the mbox files are. Edit config.php and add the following:
# when the protocol is mbox specify this one
# it needs to be a local file in mbox format, accessible to your webserver user
$bounce_mailbox = '/var/spool/mail/listbounces';
When accessing the bounce mailbox via pop3 protocol, we need to tell phpList which server provides the emails, and the username and password for the mailbox in config.php like this:
# when the protocol is pop, specify these three
$bounce_mailbox_host = 'pop.example.com';
$bounce_mailbox_user = 'popuser';
$bounce_mailbox_password = 'password';
Additionally, you might want to set the default pop3 port and encryption with the following line (standard config):
$bounce_mailbox_port = "110/pop3/notls";
Or enabling ssl on port 995 without verifying certificate common name of the certificate:
$bounce_mailbox_port = "995/pop3/novalidate-cert"
Setting up mailbox purge
Unless you’re doing some tests, you would want to delete bounce messages once they are fetched, so they won’t be counted twice:
$bounce_mailbox_purge = 1;
You may also want to delete messages from the mailbox that could not be processed because they do not match a user in the system. Messages are still downloaded into phpList, so it’s safe to delete them from the mailbox.
$bounce_mailbox_purge_unprocessed = 1;
You can define how many bounces in a row it needs for a user to be marked unconfirmed.
Be aware that deleting processed bounce messages from phpList with advanced bounce rules will disable this functionality.
$bounce_unsubscribe_threshold = 5
Downloading and processing bounces
Downloading and processing bounces can be handled in the user interface under System > Process Bounces.
You may also setup a cron task to download and process bounces on a regular basis, see the chapter about cron tasks.
In that case, you might want to disable the Process Bounces menu entry by adding the following:
define ("MANUALLY_PROCESS_BOUNCES",0);
define('BLACKLIST_EMAIL_ON_BOUNCE', 1);
Advanced bounce management
Advanced bounce management enables the automatic performance of various actions depending on the kind of bounce error code that is returned by the MTA.
To enable it just add the following in config.php
define('USE_ADVANCED_BOUNCEHANDLING',1);
Once this is set up, you may proceed in the phpList interface to System > Manage Bounces > List Bounces Rules
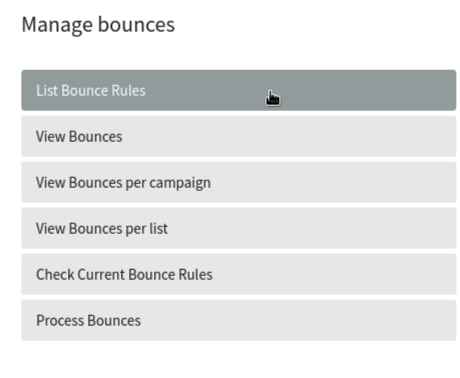
From there you may create new bounce rules, based on regular expressions that will trigger phpList actions.
Regular expressions are sequences of characters that match a search pattern. While this manual won’t explain the use of regular expressions, we will analyse the examples given here.
Bounce emails generally contain a header and a mail body that may, depending on the MTA that sent the email, give a reason why the initial email could not reach its recipient.
An example bounce email could look like the following:
Final-Recipient: rfc822; someuser@example.com
Original-Recipient: rfc822;someuser@example.com
Action: failed
Status: 5.2.1
Remote-MTA: dns; mx1.example.com
Diagnostic-Code: smtp; 550 5.2.1 This mailbox has been blocked due to
inactivity (UserSearch)
What we see here is the recipient’s MTA telling us that the user’s mailbox is blocked, probably because it’s not been used for a long while. There are some excellent articles about MTA responses on the internet. Every MTA programme has its own return messages. Also, you may have noticed that the return messages usually come with a 3 digit code, 5.2.2 in this example.
This code is the error code corresponding to the return message, but some MTAs just give bogus codes, especially when they think your email is spam.
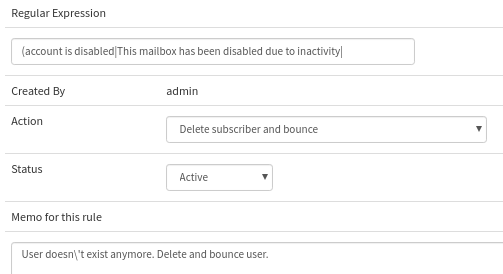
Now let’s create our first bounce rule:
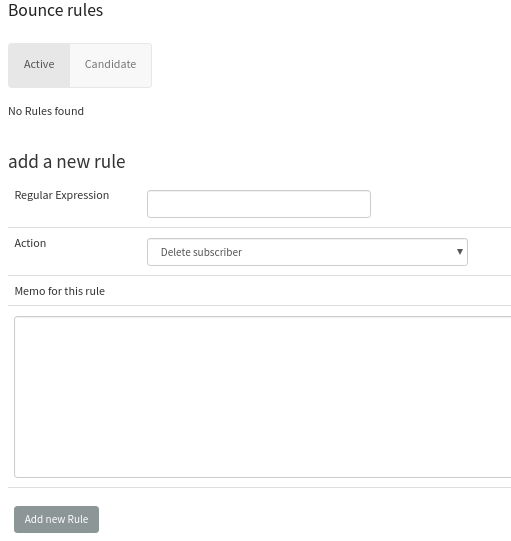
The regular expression could be the exact sentence the MTA return message contained, in brackets.
Now phpList provides multiple actions that can be triggered if a bounce email matches our regular expression:
- Delete subscriber
- Unconfirm subscriber
- Blacklist subscriber
- Blacklist email address
- Delete subscriber and bounce
- Unconfirm subscriber and delete bounce
- Add subscriber to the do-not-send list and delete bounce
- Add email address to the do-not-send list and delete bounce
- Delete bounce.
In our case, we can assume that our subscriber’s email address haven’t been used for a long while, and that it’s safe to unconfirm the subscriber.
Now we have a choice between “unconfirm subscriber” and “unconfirm subscriber and delete bounce”. The only real difference between both options is that deleting the bounce message will also remove it from bounce statistics (using the BounceStatisticsPlugin).
Once we finished our rule, we may add it and try it against our bounces.
Back in phpList, we can check if our rule matches any of our actual bounces, by going to System > Manage Bounces > Check Current Bounce Rules.
The system will then tell us how many bounces are caught by our rules.
Now you may have a big list of bounces that aren't caught by the rule, and some of them are pretty similar to the rule.
We may have multiple bounce messages that could say “account is disabled” or “This account has been disabled” which basically means the same as “mailbox has been blocked due to inactivity” of our first rule.
Way may create two other rules to deal with these bounces, or improve our regular expression to match all these messages with the same rule.
Regular expressions use the pipe symbol “|” as OR statement, meaning the following regular expression:
(black|white) would match any text that has the words black or white in it.
Now let’s improve our first rule by adding all our MTA return messages that basically mean the same thing:
The actual regular expression I used here is:
(account is disabled|This mailbox has been blocked due to inactivity|This account has been disabled|The email account that you tried to reach does not exist|This is a permanent error .* local delivery failed)
Note that the .* is a wildcard token that means there can be up to zero characters between “This is a permanent error “ and “ local delivery failed”.
This rule can now deal with any of these 5 return messages.
Good starter rule set:
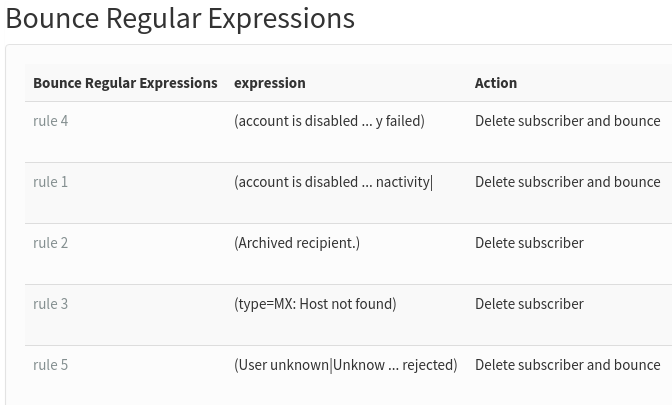
Rules to copy
(Archived recipient.) Delete subscriber
(delivery error: dd This user doesn't have a yahoo.fr account|This user doesn't have a yahoo\.fr account) Delete subscriber
(type=MX: Host not found) Delete subscriber. No mail records for the domain.
(sorry, no mailbox here by that name|Mailbox disabled|address not found in table|User mailbox is not local|mailbox not allowed|Mailbox syntax incorrect|RESOLVER\.ADR\.RecipNotFound) Delete subscriber and bounce. No ambiguity here, we can also delete the bounce message.
(account is disabled|This mailbox has been blocked due to inactivity|This account has been disabled|The email account that you tried to reach does not exist|This is a permanent error .* local delivery failed) Delete subscriber and bounce. Same as above
(User unknown|Unknown user|Unknown address|No such recipient|No such user|The email account that you tried to reach is disabled|Recipient not found|Recipient unknown|Invalid recipient|Address unknown|Recipient address rejected) Delete subscriber and bounce. Same as above
Feedback
Discuss this chapter here.